fileupload click event for upload only excel files only in asp.net
Introduction to ASP.Net FileUpload
A FileUpload server control is a command that displays a box and a browse push on the web page. It allows the user to select a file from the local storage and upload it to the server. Why did I employ the term server control? Well, considering like all other server controls, ASP.NET provides its ain tag for the FileUpload command which is run at the server and the generated HTML code is returned as a response to the browser. So, thinking from an HTML perspective, the FileUpload command generates the HTML text box and a button that triggers the local file explorer. It lets the users select a file and upload it to the server.
Syntax:
The FileUpload control can be coded using ASP.Net provided tags or dragged and dropped using Visual Studio IDE. The drag and drop feature ultimately generates the same code.
<asp:FileUpload ID="<FileUploadId>" runat="server" />
Backside the Scenes
So, how does the FileUpload mechanism work? When the user selects a file from his local storage, the FileUpload control initiates an object which stores the basic information most the file. This information contains the file proper noun, extension, directory path, file size, etc. The object has a property HasFile which is and then set up to true. This property determines whether the user has selected any file or not.
Annotation that till this signal, the file hasn't been uploaded to the server. It has simply been selected by the user. The browse push generated by the FileUpload control does not really upload the file. This has to exist done by writing a piece of code that instructs the FileUpload control to save a copy of the file in a path on the server. When this piece of lawmaking is triggered, the FileUpload command simply sends the file over HTTP(South) protocol to the server and stores it at the specified path.
Properties of ASP.Net FileUpload
The ASP.Cyberspace FileUpload command comes with sure pre-defined properties. These backdrop are converted to attributes in the native HTML code. They assistance ascertain additional beliefs for the FileUpload control.
i. AllowMultiple:This belongings gets or sets a value that permits or restricts the user to select multiple files simultaneously. The default value is false, which ways the user is non immune to select multiple files by default.
<asp:FileUpload ID="myFileUpload" AllowMultiple="truthful" runat="server" />
2. BackColor, ForeColor:This holding gets or sets the background and the foreground color of the control.
<asp:FileUpload ID="myFileUpload" BackColor="DarkBlue" ForeColor="White" runat="server" />
three. BorderColor, BorderStyle and BorderWidth: These properties get or prepare the border styling for the control.
<asp:FileUpload ID="myFileUpload" BorderWidth="5" BorderColor="Blue" BorderStyle="dashed" runat="server" />
4. CssClass:This property gets or sets the CSS course to be practical to the control.
<asp:FileUpload ID="myFileUpload" CssClass="txtBxClass" runat="server" />
5. Enabled: This holding gets or sets the value indicating whether the control is enabled or disabled. The default value is true.
<asp:FileUpload ID="myFileUpload" Enabled="false" runat="server" />
6. Font: This belongings gets or sets the font of the text to be displayed in the control. There are plenty of styles and options such every bit bold, italics, underline, strikeout, etc.
7. Tiptop, Width:These properties go or set the height and width of the control in the number of pixels.
<asp:FileUpload ID="myFileUpload" Height="100" Width="500" runat="server" />
8. ID:This property gets or sets the unique identifier attribute to the control.
<asp:FileUpload ID="myFileUpload" runat="server" />
9. ToolTip:This property gets or sets the tooltip value to be displayed when the mouse pointer is hovered over the control.
<asp:FileUpload ID="myFileUpload" ToolTip="Click here to select a file." runat="server" />
10. Visible:This property determines whether the control will be displayed on the UI or hidden. The default is true.
<asp:FileUpload ID="myFileUpload" Visible="false" runat="server" />
Example of ASP.NET FileUpload
Let the states create a file upload sample awarding step by step.
Step 1:Create a new ASP.Net WebApplication project. This volition create a beat template with a working application with a Default.aspx and Default.aspx.cs page. The .cs page is the lawmaking backside folio for the .aspx page.
Pace 2:Go to the Default.aspx file and remove the contents of the vanquish template to wait like below:
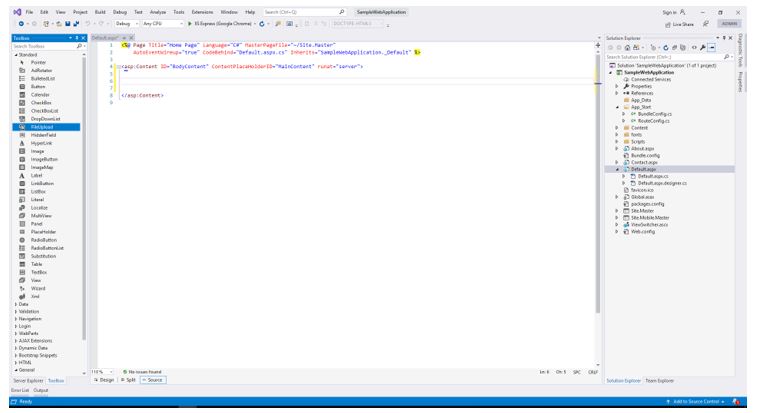
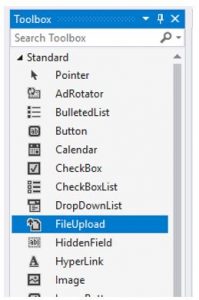
Pace 3. In the Toolbox pane of Visual Studio IDE, you would detect a gear up of Spider web controls ready to drag and drop in your project. Detect the FileUpload control and drag it in the Default.aspx page.
Pace 4:Once you drop the FileUpload control, you would discover an machine-generated ASP.Net FileUpload tag in your Default.aspx file. Modify the code to look like below.

Alternatively, you can skip the drag and drib part and write the above lawmaking yourself.
<asp:FileUpload ID="FileUpload_Control" runat="server" />
Step 5: Copy the below code in your Default.aspx file.
<%@ Page Title="Home Page" Language="C#" MasterPageFile="~/Site.Main"
AutoEventWireup="true" CodeBehind="Default.aspx.cs" Inherits="SampleWebApplication._Default" %>
<asp:Content ID="BodyContent" ContentPlaceHolderID="MainContent" runat="server">
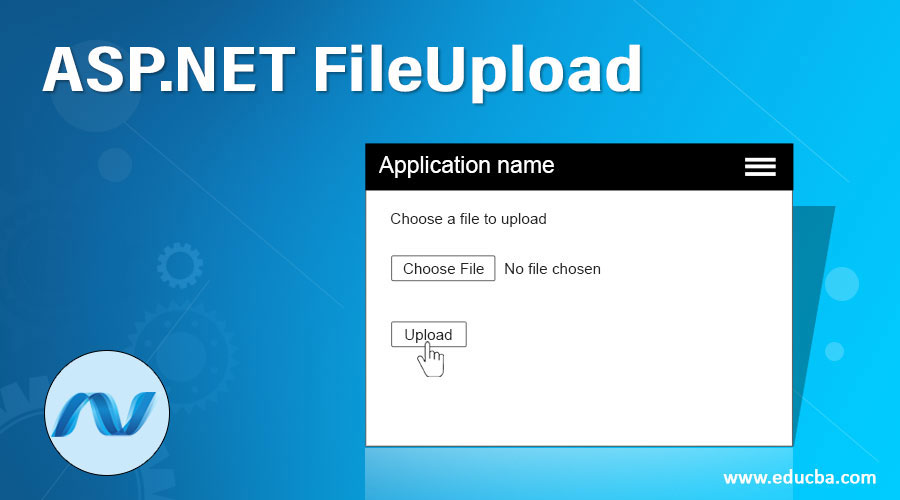
<asp:Label ID="FileUpload_Caption" runat="server" Text="Choose a file to upload."></asp:Characterization>
<asp:FileUpload ID="FileUpload_Control" runat="server" />
<asp:Push button ID="FileUpload_SaveBtn" runat="server" Text="Upload" OnClick="FileUpload_SaveBtn_Click" />
<asp:Label ID="FileUpload_Msg" runat="server" Text=""></asp:Label>
</asp:Content>
Step 6:Copy the below code in your Default.aspx.cs file.
using Organization;
                using System.Web.UI;
                namespace SampleWebApplication
                {
                public partial course _Default : Page
                {
                protected void FileUpload_SaveBtn_Click(object sender, EventArgs e)
                {
                //cheque if user has selected a file
                if (FileUpload_Control.HasFile) {
                try
                {
                /*save file to location.
                Brand sure the directory path is correct.*/
                FileUpload_Control.SaveAs("C:\\FileUploadExample\\" + FileUpload_Control.FileName);
                FileUpload_Msg.Text = "File uploaded successfully.";
                }
                catch
                {
                FileUpload_Msg.Text = "Error - Unable to save file. Please endeavour once more.";
                }
                }
                else {
                FileUpload_Msg.Text = "Error - No file chosen.";
                }
                }
                }
                }
Step 7: Run the awarding. Below is the output of your code. It has a file upload control that allows users to browse and select a file from the local storage.
The code-backside file has a SaveAs() function to the FileUpload object. This method uploads the contents of the file and saves them to the specified directory.
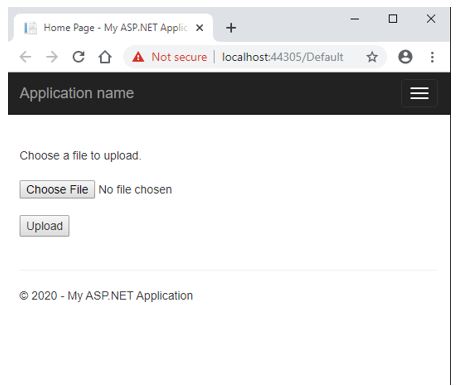
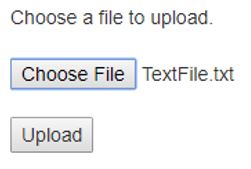
The above is the landing page of your application. Choose a file by clicking on the Choose File push. In one case you lot take chosen a file, the file proper noun is displayed aslope the FileUpoad command.
Click on the Upload push to execute the code behind the method FileUpload_SaveBtn_Click. This method contains the SaveAs telephone call to the server.
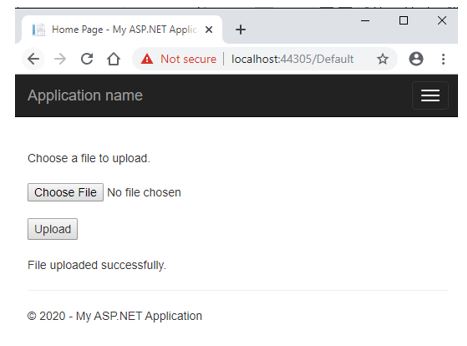
Notice that the file is indeed saved at the specified path in the server. In our example, our local storage is the server as we are running the application on localhost.
Conclusion
To get more than advanced grooming on some of the advanced properties and code behind logics, the official Microsoft documentation is highly recommended.
Recommended Articles
This is a guide to the ASP.Net FileUpload. Here nosotros discuss the introduction, properties, and various examples of ASP.Internet FileUpload. You may likewise have a wait at the following articles to learn more than –
- RadioButton in ASP.NET
- Ajax in ASP.Internet
- Push in ASP.Net?
- ASP.NET Image
Source: https://www.educba.com/asp-dot-net-fileupload/
Post a Comment for "fileupload click event for upload only excel files only in asp.net"