Steamvr Please Sign in Again to Continue the Action
Overview
The VR ecosystem is growing every day and with Knuckles we're adding quite a bit of potential to the infinite. SteamVR now needs to handle finger tracking and forcefulness sensors. This requires we take another look at how nosotros're handling input now, and how we'll handle it in the future. Joe Ludwig posted nigh the new SteamVR Input System a scrap here. Now we're going to dive into how yous equally a Unity developer can utilize this organization to stop worrying almost each new input device and focus on creating your virtual reality. We'll start from the beginning with downloading the unity plugin, get through adding new actions, bounden them, using them in the editor and code, and finally creating a build.
We have not removed admission to the sometime input functions, but both tin can't exist used at the aforementioned fourth dimension. We strongly encourage you to movement to the new input system. All of the scenes, prefabs, the default camera rig, and the interaction system in the SteamVR Unity plugin now use this new organisation. Only if you adopt, the old arrangement is on the releases page of our github.
Video version
If you'd prefer a video version of this tutorial you can watch it on youtube here: https://www.youtube.com/scout?v=qo-9CmcKWlY
Downloading the Plugin
This is an significantly unlike iteration of the Unity plugin. We've made a lot of changes to how input works and we desire to brand sure we proceed to get your feedback. Nosotros welcome you to post about problems on our github issues page here. You can download the SteamVR Unity Plugin from the Unity Asset Store here or on the releases folio of the SteamVR Unity Plugin on github. If you'd similar to suggest specific code changes please do that with an Issue or Pull Request on our github page.
To starting time off, get alee and download this parcel and excerpt it into a new Unity project. We recognize that many of our developers are still on older versions of Unity and we are committed to continuing to support them. Currently the plugin will work equally far back as Unity version 5.4 and up to 2019.1.
SteamVR Interaction System
The SteamVR Interaction Organization has been updated to support the new SteamVR Input System as well every bit the Knuckles EV2 and EV3. You tin can find the main scene in your project under Assets/SteamVR/InteractionSystem/Samples/Scenes/Interactions_Example.unity
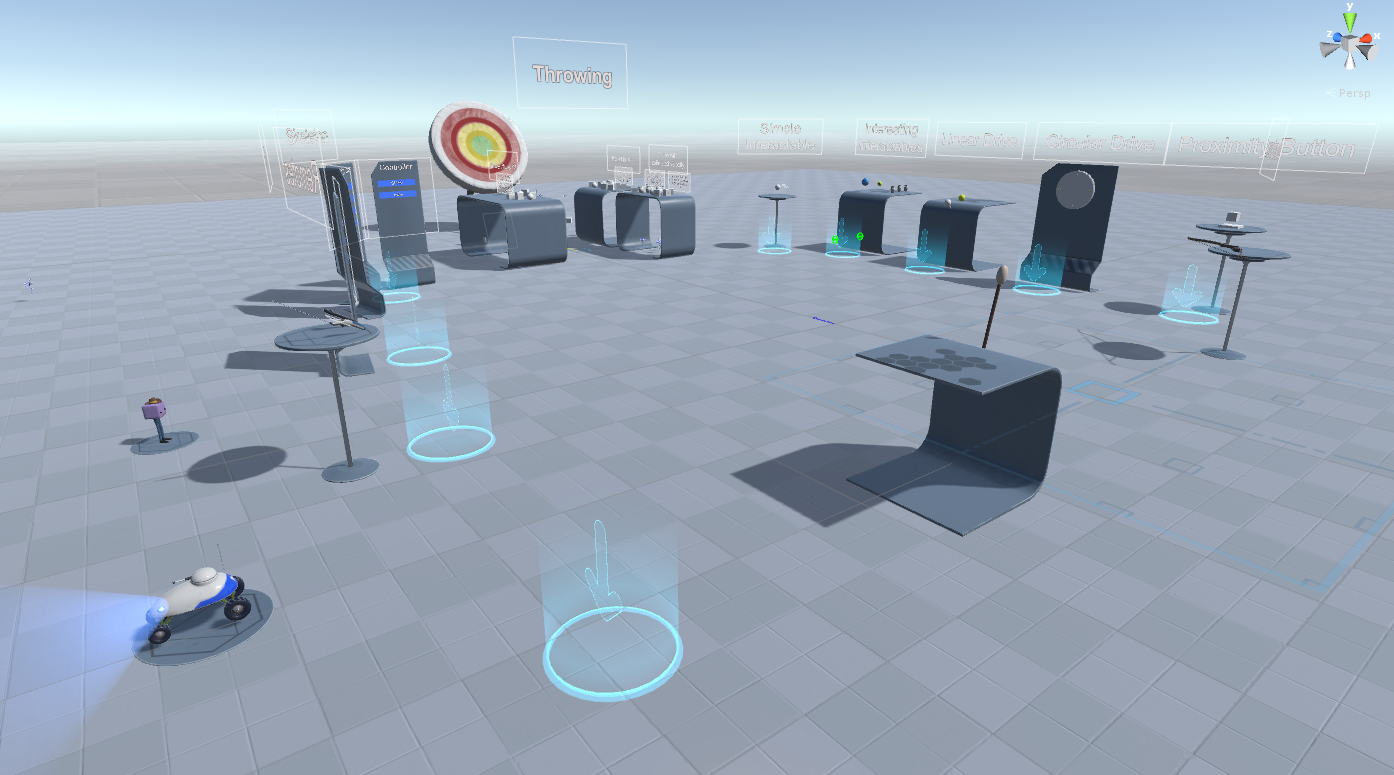
In this scene you'll find a number of new things. We've extended throwing examples, added a platformer controller, an RC auto, a simple push button, grenades, and lots of hand samples.
In the throwing section at that place'south now a basic example of item interaction with velocity based move similar to NewtonVR. This makes information technology so your items no longer pass through solid colliders unimpeded. Instead they slide more smoothly around obstructions. A more hearty velocity interpretation algorithm has been added to not just average existing controller velocity just to match throwing intent fifty-fifty if the bodily release indicate was a bit too early on or belatedly. And we've separated out the existing styles of interacting with items and then y'all can assess those also. All of these interactable $.25 are settings on the existing Throwable component.
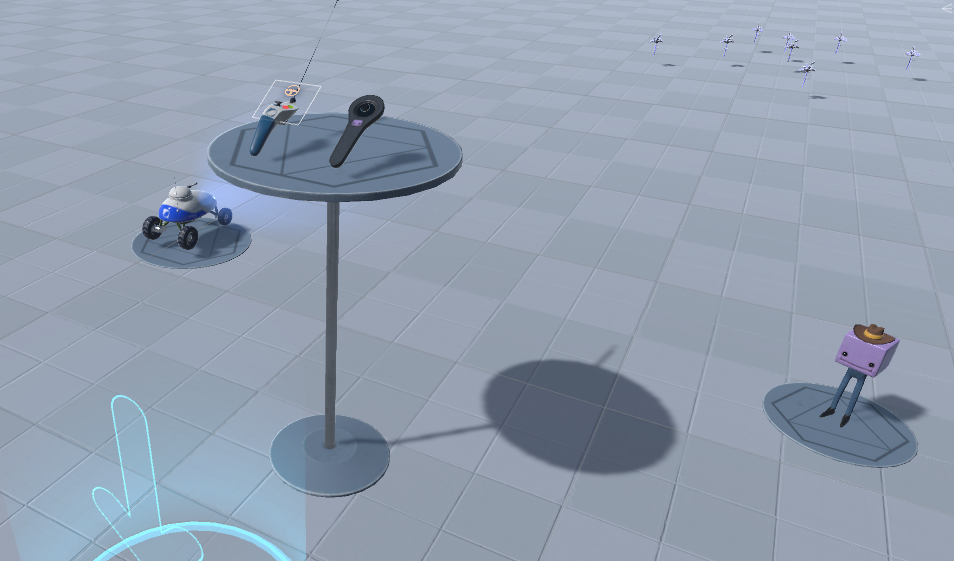
The platformer and rc car department has some fun samples for you to detect. They're relatively simple controllers merely show a more than indirect class of interacting with your globe. The controllers hold the actions and go queried with the paw that is holding them.
Knuckles brings finger tracking to SteamVR. This is accessed through the new SteamVR Skeletal Input system. Duke estimate finger positions and then passes that information off to the driver which interprets that into 31 bone transforms. This can be used to much more than deeply engage the user with their reality. Just this isn't a feature sectional to Knuckles. The plugin besides includes finger estimations for Vive wands and Oculus Touch, and we'll be working with Microsoft to add together support for Windows MR controllers too. By default in the scene you lot'll now see hands too as controllers. You can teleport over to the Skeleton department of the scene to Evidence and Hide the controller models as well as switch between a manus animation gripping the current controller and a manus animation that opens and closes freely. To acquire more about the SteamVR Skeletal Input system, view this blog postal service.
The SteamVR Input window
If yous select your Window menu you'll see a new item here chosen SteamVR Input. Click on that and you'll likely go a dialog explaining that yous're missing an actions JSON and asking if you'd like to use the default. Select Yes and it'll re-create the default actions.json file, as well equally the related bindings files for a few popular controllers into the root of your projection directory. This is where SteamVR will read them from when you go into Play Style and where information technology'll re-create them from when you make a build.
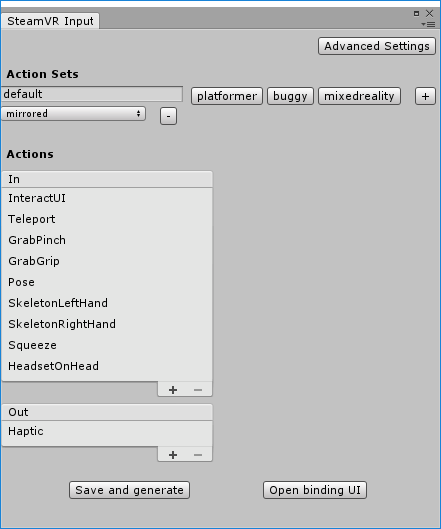
One time those are copied the window volition populate a listing of actions sets and actions that are used in the Interaction Arrangement scene. We'll get into adding and modifying actions later for now we're going to skip down to the lesser of this window to Relieve and Generate. Clicking this push button will commencement a agglomeration of behind the scenes work to plumb your deportment into generated properties for you to directly to access them without magic strings.
When the progress bar completes information technology will accept created a folder in your project called SteamVR_Input with all those lawmaking files in information technology. This path tin can be configured through the settings push button at the top of this window.
Testing
Alright, lets see these actions in... activity! Now that you've imported the plugin and generated your deportment you should exist able to just hit play to go in earth and bank check out the interaction system example scene.
Once yous've looked around a little scrap let'southward take a look at the state of the actions themselves. Nosotros have an piece of cake ways to visualize the country of actions at runtime. In the window carte you'll meet a new pick: SteamVR Input Live View. This is a live view of all your actions separated by action gear up and controller. Open your scene view and your game view so they're both viewable at the aforementioned time and make sure the "Maximize on Play" push is unchecked. This button provides significant in editor operation increases but we desire to see the residue of the editor right now.
When an activeness'south value changes it will highlight green and then fade abroad to requite you lot a strong visual indication of state change. A yellowish background for an action means it hasn't been accessed by your code yet. We merely start updating actions once yous access them somehow. If you're not seeing whatsoever changes when you lot press buttons make sure that your controllers are being recognized past SteamVR and that you don't have whatsoever errors in the panel.
Calculation an action
SteamVR Input abstracts away the device specific parts of your code so you tin can focus on the intent of the user - their actions. Instead of writing the code to recognize "pulling the trigger push down 75% of the way to grab the block" you tin can at present just focus on the last bit of that, "take hold of the cake". You still configure the default for what "take hold of" means simply the user tin can rebind information technology to their preference in a standard interface. And when a new input device comes out your users can publish bindings to share for that device with no code changes on your end.
Back in the SteamVR Input window you'll find your list of actions. Selecting an activeness will populate its details and allow them to exist modified. Boolean, vector1, vector2, and vector3 types should be pretty straight forward. The skeleton type controls the hand os position/rotations. Pose is the position/location of the controller itself. At the bottom you'll see the localized string for an action, this is what users volition see in the binding UI, so try and give your actions brusque simply descriptive names.
Nosotros've included a sample script and model for a planting instance, and then lets get ahead and implement an activity for that. In the default action set at the bottom of the In actions hitting the plus icon to create a new action. Go over to name and proper name this action "Institute". Nosotros want to proceed it boolean since the thought is nosotros're either planting or non, and nosotros don't desire to require this action to be bound since information technology's not disquisitional to our application so exit it as suggested. Under localization lets indistinguishable the name for English, but put in "Plant" there as well.
At present lets relieve and generate. This volition save out a new actions.json file (which you're welcome to look at, it's simply text) so generate a scriptable object and property for our new activity.
Binding actions
Once we've created our new action we now demand to bind it to a push for testing. So after it'due south done generating click the "Open Binding UI" push button. This will open your default browser to the SteamVR bounden UI with the selected awarding being Unity.
If you lot're presented with a list of games instead of a listing of bindings you may accept renamed your Unity executable and y'all'll need to go into play mode and click the open binding UI push button again to get Unity to register correctly.
Select the electric current binding by clicking the Edit push next to information technology. You should now see a list of buttons for your currently tracked controllers and deportment that are jump to them. Near the meridian your default activeness set should be highlighted scarlet, if you mouse over that information technology will let you know that your suggested action "Constitute" has not even so been bound.
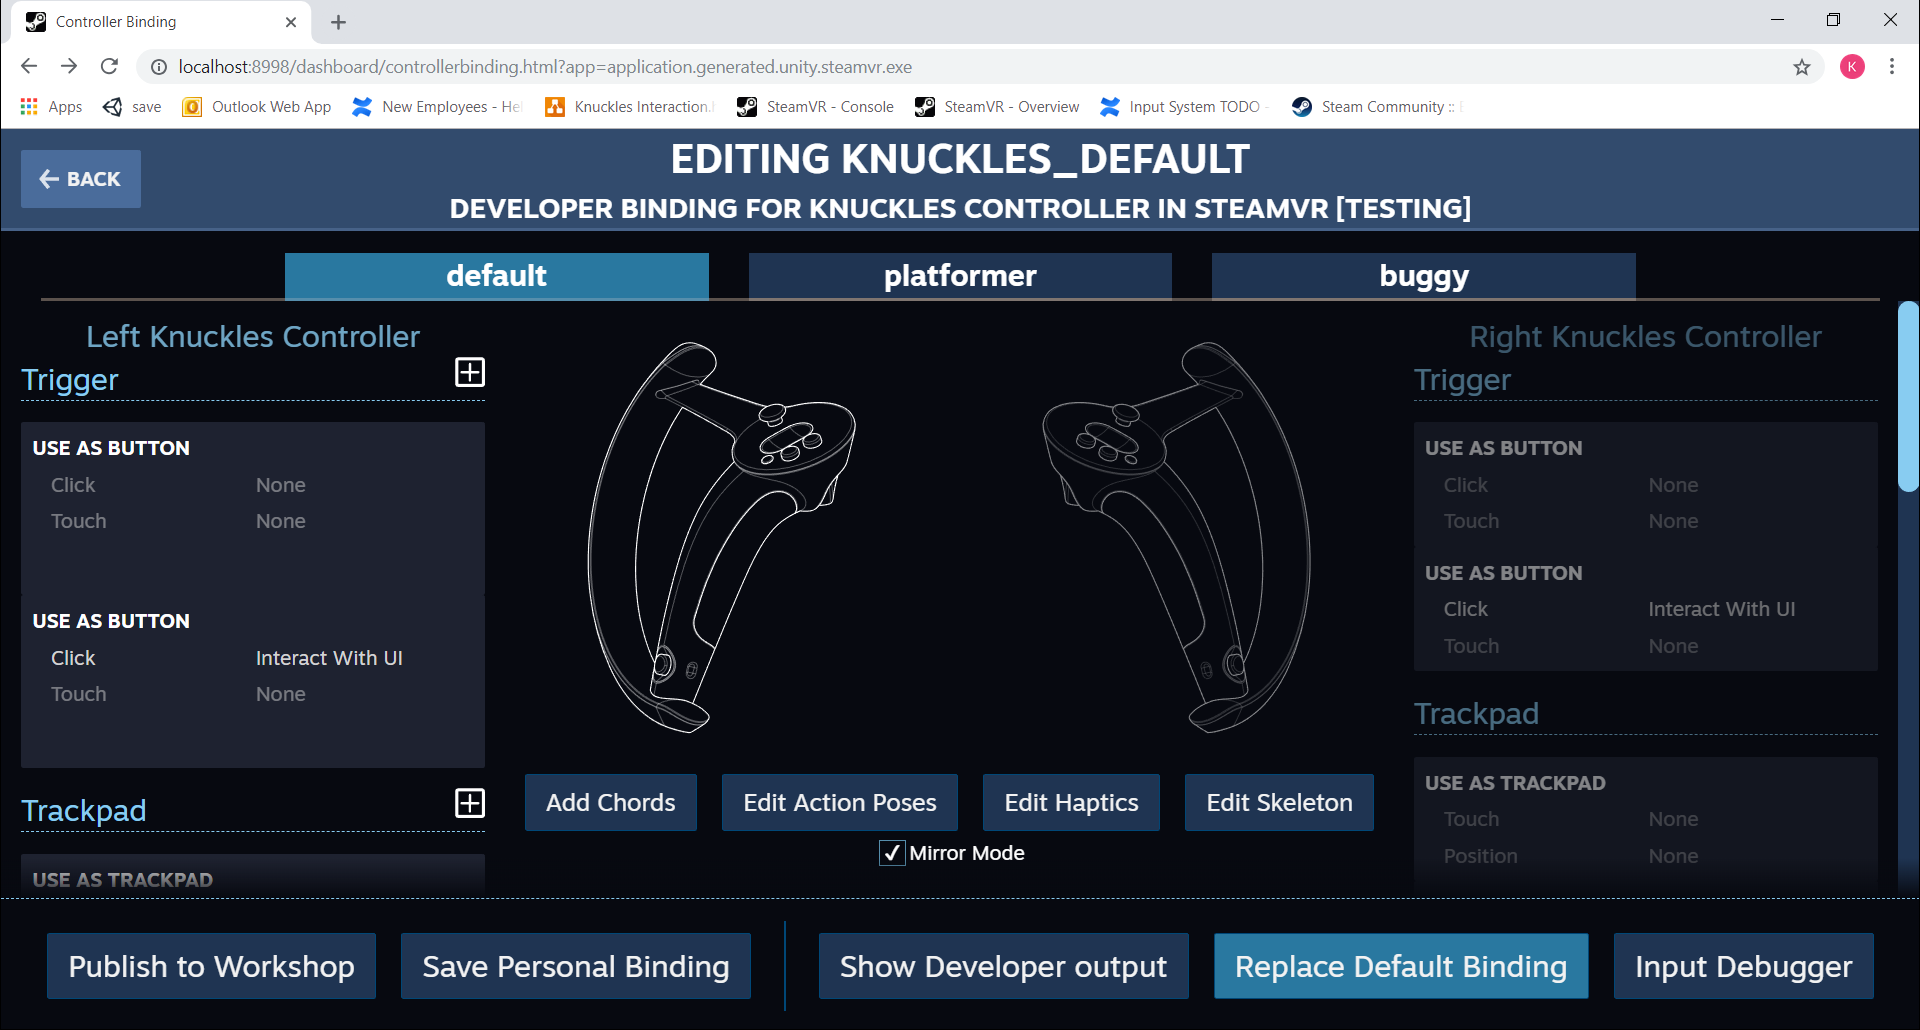
I'one thousand going to roll downwardly to my A button since it doesn't have any bindings yet and hitting the plus icon next to that. That will requite me a listing of options on what sort of mode I want to bind for this action. I desire something uncomplicated so I'm going to select Push button. Next to the text "Click" nether Button you'll run across a box that says None, click on that and it will prompt yous to demark the push click to an action. Select Constitute.
We want the aforementioned response on both controllers so under the A button on the other hand repeat the aforementioned steps.
At present y'all tin become to the bottom of the window and click the Supercede Default Binding push button. This volition automatically supplant the associated binding file in the root binder of your projection with these new changes.
To solidify this alter hit the dorsum button on the binding UI to become to your bindings for Unity. At present you should have an existing "Current Binding" simply now also one under "Official Bindings" that you merely created. Select View here and then "Select this Binding" at the bottom left to adhere this binding file that you've exported equally your current bounden. If it prompts y'all nearly your local changes you can freely discard them since we explicitly exported those changes.
Assigning deportment in the editor
We've created, generated, and bound an action now let's assign information technology to do something. In the projection you'll notice a script at Avails/SteamVR/InteractionSystem/Samples/Scripts called Planting. Drag this component onto your hands in the hierarchy at Player/SteamVRObjects/Hand1 and Thespian/SteamVRObjects/Hand2. In the inspector for these two components you'll see a dropdown for the "Plant Action" click on the dropdown and select \deportment\default\in\Constitute. It's that easy to apply actions in the editor.
Go into play mode and striking the A button (or whatsoever you jump) and bank check out your fancy planted flower!
Working with actions in the code
Double click on the Planting script to open it in your IDE and let's take a look at how our script interacts with this action.
At the top y'all'll see an OnEnable method that has a reference to our activeness in it. It's calling the AddOnChangeListener method and passing in a method we want called when the action changes. We're also passing in the type of paw that the script is currently on and then nosotros only get modify events when the action has changed for that paw.
In OnPlantActionChange we've gotten a notification that the action'due south land has inverse but that could exist to truthful or to false. We only intendance about when the push has been pressed down so nosotros call GetStateDown and again laissez passer in the hand blazon that we're working with. If the button was pressed downward then nosotros execute our planting coroutine. Yous're not restricted to calling GetStateDown from inside an consequence, yous can phone call it from anywhere, within Update, coroutines, etc.
If you'd prefer, y'all tin can reference actions explicitly in lawmaking by named property in the SteamVR_Actions class:
Working with actions in the Editor
We've likewise got some helper components if you're more than comfortable with the editor than lawmaking. Let'due south become back to Hand1 and Hand2 and add SteamVR_Input_Boolean components to them. Select our plant action on that component. Here y'all'll see a lot of unity events for different button state changes.
Planting one flower at a time is okay, but I want more, like a lot more than. Let's hitting the add button in the OnPress department of the SteamVR_Input_Boolean component. And then drag our planting component into the object section. Under function select the Found method.
At present when you go into Play mode you lot'll plant a flower on press down but also whenever the button is pressed at all. By default this will execute once per frame. Lots of flowers!
Troubleshooting actions
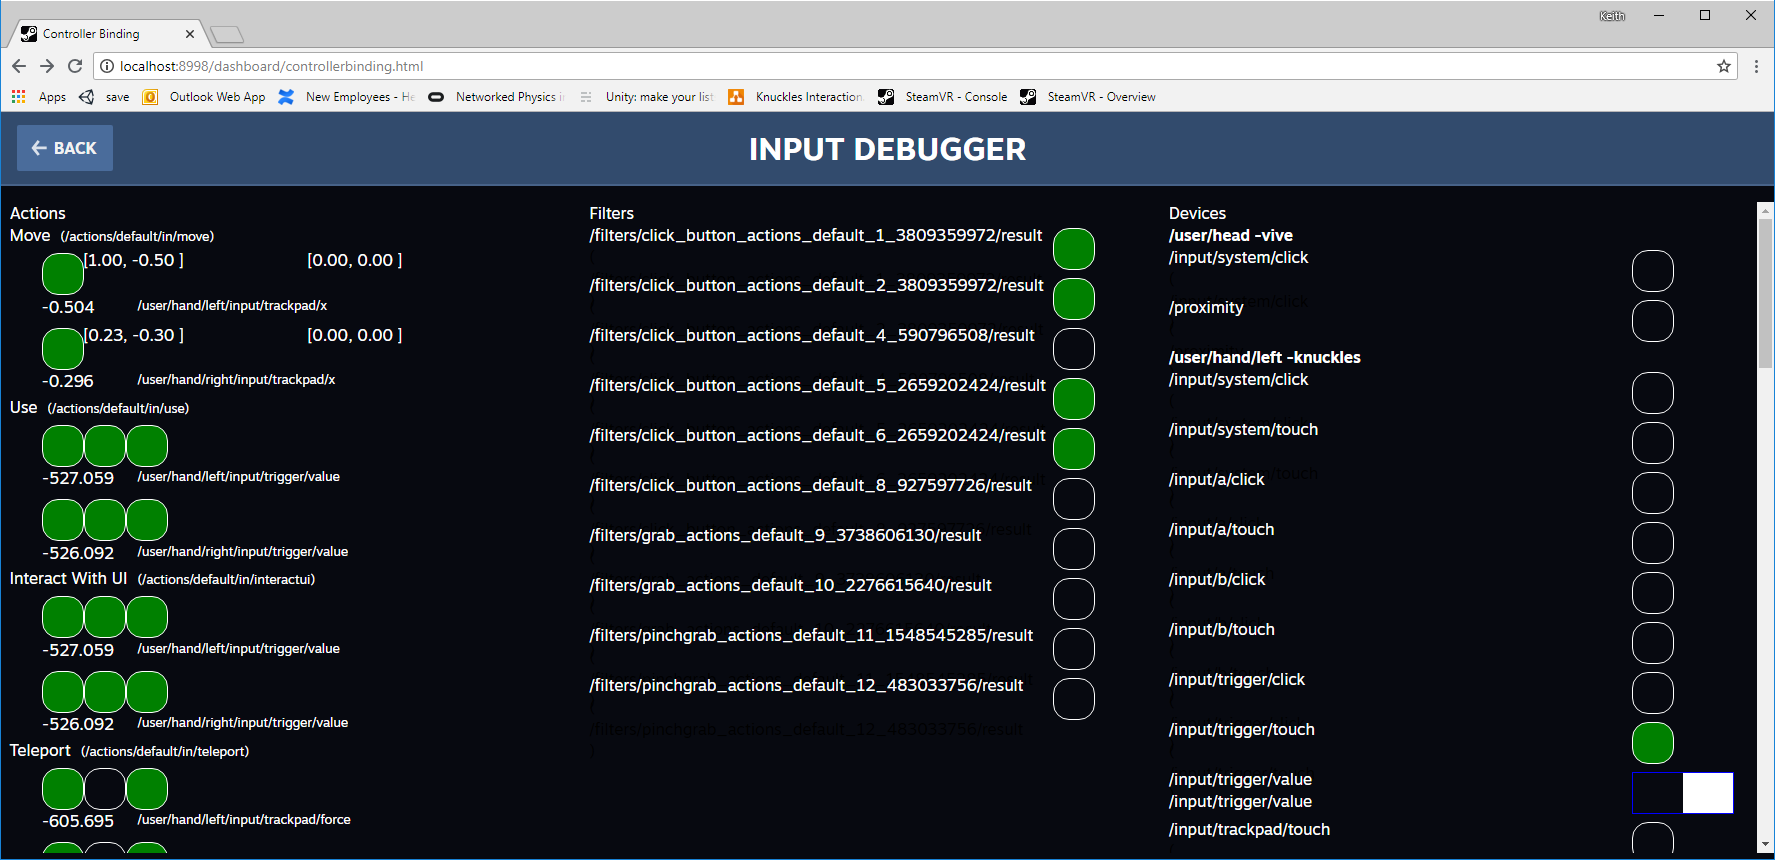
If you're having trouble with your deportment and want a different interface for viewing u.s. at runtime check out the Input Debugger. In the binding UI select your game, select your current binding then in the lower right hand corner click the Input Debugger push button.
On the left you'll see a list of actions and their current states. For a given activity the first circle is if the action is agile, the middle is if information technology'due south currently true, and the terminal is when that action has changed.
On the right yous'll come across the currently tracked controllers and the states of their private buttons.
Creating a build
When you go to create a build nothing has changed every bit far as your workflow goes merely 1 new thing will happen. Your action and bindings files volition be copied to the build directory alongside your executable. By default they will overwrite what'due south in that location to ensure you have the most up to appointment bindings for your build. If you lot don't desire this to happen there's an option to disable that in the SteamVR Input window.
Source: https://valvesoftware.github.io/steamvr_unity_plugin/tutorials/SteamVR-Input.html
Post a Comment for "Steamvr Please Sign in Again to Continue the Action"